Causes Of Drywall Damage
Fixing drywall can be a headache for a homeowner. Though you don’t have to fix the damage yourself, you still have to worry about it reoccuring
Plumbing Leaks
One of the leading causes of broken drywall is water damage. If your plumbing is older or has been improperly installed you may run into some major issues further down the road. One of these is water damaged drywall.
Poor Fastening
When your drywall was installed it was most likely attached via joint fastening tape. As time goes on, this thick tape can loosen due to moisture or age, and start to buckle the drywall it’s holding together. This will show up very obviously in your walls.
Cracking
Cracks can happen in poorly installed drywall. It most often occurs in ceilings. The moment a crack is noticed, you should absolutely contact an expert to come and repair the damage. Cracked drywall is a safety issue. If you notice cracking happening often, you should have your roof inspected. Sometimes it is also caused by your house settling.
Termite Damage
Termites are a major issue for lots of homeowners. If you notice termite damage immediately call an exterminator. Termite damage can be identified by pinholes, a hollow sound when you strike the wall, damaged paint and wood damage.
How to patch drywall.
I’d like to rephrase that. Classifying my kitchen renovation as an “event” seems wrong. A bit of a narcissistic exaggeration, heh. It would be more appropriate to say the renovation has been an ass pain undertaking. The completion of it will be an event! Complete with contortionists and ponies if I have my way.
I’ve had to hire only 4 people to do things around my house in the past 5 years or so. The nice man Tim who unclogged my pipes, Dave who did my electrical work, Grant who is installing my kitchen and Kyle … who drywalled my ceiling. None of those phrases are euphemisms.
All of these were jobs I couldn’t do myself. I tired to fix my plumbing but wasn’t successful, I tend to shy away from elaborate electrical work or anything that might kill me if done incorrectly, and I don’t have a clue about how to hang cabinets in a house that has walls that look like you’re seeing them through a funhouse mirror.
Drywalling on the other hand I can do. What I can’t do is drywall a ceiling. I’m too little, drywall is too big and it brings out the swear words in me. Words like snarklefart. So in the spirit of “Save and Splurge” I hired Kyle to drywall the ceiling, while I did all the other drywalling that needed to be done in the kitchen. If it wasn’t on the ceiling, I was doing it
I know. Drywalling scares people. Putting nail holes in it scares people, knocking a hole in it scares people and putting anchors into it scares people
HOW TO PATCH DRYWALL
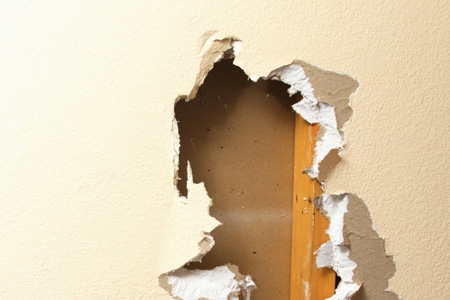
It’s inevitable. No matter how careful you are, holes in your drywall are going to happen. Fortunately, no matter how extensive the damage, it is fixable.
Step 1: Cut a Square Around The Damage
Cut the hole into a square or rectangular shape using a keyhole saw. Now cut a replacement piece of drywall 2″ longer and 2″ wider than the hole you just made. Use a tape measure to make it the right dimensions.
Step 2: Make a Patch
Create a patch to fill in the hole. Lay the replacement piece of drywall on a flat surface with the backside facing up. Measure in 1″ from all four edges and draw a line using a pencil. This should form a shape the size of the hole. Using a straight edge and utility knife, cut through the backside paper and the drywall gypsum. Do not cut the front-facing layer of paper. Using a putty knife, peel away the backside paper and gypsum layer. Be careful not to tear the front-facing paper. The smaller part of the patch should fit into the hole. The paper edge should extend 1″ beyond the hole.
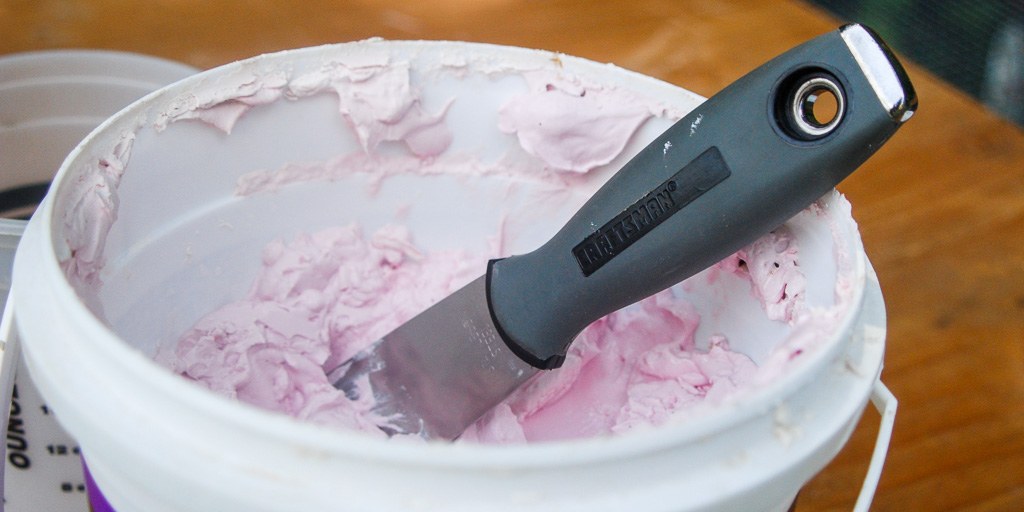
Step 3: Apply Joint Compound
Apply a thin layer of joint compound around the hole. Place your patch into the hole. Using a putty knife, work the paper edge down into the compound. Feather the edges of the compound and allow it to dry. Sand lightly with a fine-grit sandpaper and apply a second layer of joint compound to finish the repair.
PATCH LARGE DRYWALL HOLES (6″ TO 12″)
Step 1: Square Off the Hole
Use a keyhole saw to form the hole into a square or a rectangle. Holes up to 12” require a slightly different repair that provides more support than smaller holes.
Step 2: Create a Patch Larger Than the Hole
Cut a piece of drywall that’s 2” larger than the hole to be repaired. Using a drill, create two small holes through this piece of board, feed some string through and tie both ends of the string to a stick (tie in the middle). Allow for about 8″ of string between the board and the stick. The “stick side” of the board will be the front. The stick will be used to hold the patch in place. By twisting the stick, it applies pressure to the rear of the board to steady it in the hole.
Step 3: Place the Patch
Place the patch by first applying a smooth coat of cement adhesive around the edges of the piece of wallboard material. Insert the patch into the hole and position it so the cement adhesive firmly grips the solid area around the rear of the hole. Turn the stick clockwise, twisting the string and increasing pressure against the patch board at the rear of the hole. This will hold the board firmly in place until the cement adhesive dries.
Steps to a Permanent Fix with 3M Patch Plus Primer
Do you have a crack in your drywall that keeps coming back? Today’s post will help you fix this annoying problem in easy steps using 3M’s Patch Plus Primer.
This weekend I was cleaning out the guinea pig cage that sits in our living room (did you know guinea pigs can live from 5 to 8 years, what the!!!) and noticed a crack in our wall under the window. Apparently the previous homeowners tried to fix it since there was evidence of old joint compound around the crack.
Dealing with old rental homes has taught me a thing or two about drywall and plaster. After reading this post I guarantee you’ll be able to permanently fix any drywall crack in no time.
Apply Fiberglass Mesh Tape to Your Drywall Crack
One of the biggest mistakes anyone can make is to just add joint compound or spackling to the drywall crack. Over time the crack will come back because the compound or spackling will never win the fight between it and your house settling
Add a Thin Coat of Patch Plus Primer to the Drywall Tape
3M Patch Plus Primer is great for repairing cracks or holes in drywall because it doesn’t require a primer coat like traditional joint compound
Can I fill a drywall hole with something and reuse the hole?
I made a mistake with drilling a hole in the drywall. It’s off by about 1/4-1/2 inch. The new hole will be really close to the old hole, or knowing my poor drilling skills, it will overlap the old hole. Someone told me I can use joint compound or something to fill the hole and reuse the hole. However, when I went to OSH, the worker said structurally, we can’t refill a hole and reuse it and that the screw/anchor will eventually get loose and fall out.
Is my friend correct that I can reuse the hole or is the worker correct that structurally we can’t reuse the hole? EDIT: I’m trying to drill holes for screw to hold a curtain rod and use anchors in the drywall. The anchors are the plastic anchors that came with the curtain rod set. I don’t think the rod and curtains weigh that much but the store worker said the filled in drywall won’t be as strong as untouched drywall.
I didn’t measure the line or drill the hole correctly b/c one of the end brackets holding the rod is like 1/4-1/2 inches too low (stupid me). I COULD move it out (or in) 1-2 inches to the left or right but then it doesn’t look symmetrical, which is why I want to just fill the holes and re-drill a hole 1/2 inch up to line everything up but if the filled in hole won’t hold the anchor, then that won’t do
Joint compound usually bonds fairly well to the gypsum inside drywall panels. However, you must get it thoroughly filled to make good contact. Also, standard joint compound shrinks substantially, so you’d be better off with a setting-type product
If you press the compound in adequately and let it dry or cure fully, you’ll be able to drill a new hole at the correct location. You’ll want to start with a small, sharp bit to be sure that it doesn’t “walk”, or shift position. Anchor your drill well to help with this.