Things to look out for onsite when installing vinyl flooring
We have compiled a few useful tips to ensure the result ticks all the right boxes, with no costly comebacks from your client:
Daily demands and deadlines often result in it being difficult to visit sites as often as intended. Regular site visits are imperative for the success and smooth running of your project.
Have you notified your building and flooring contractor of your visit? Have you considered their schedule and obligations? Empathy and consideration will go a long way in achieving a mutually beneficial outcome.
Is the site ready for the vinyl installation? Is it free from other trades? Don’t improvise! Too often flooring contractors are instructed to install the vinyl flooring when the site is far from ready, with disastrous effects.
Are the site conditions favourable for the flooring contractors? Is the lighting acceptable? Are the timelines achievable? Projects too often run over with the flooring contractors having to work under tough conditions and having to meet unrealistic deadlines. This ultimately affects the quality of the installation and very often results in a costly re-do.
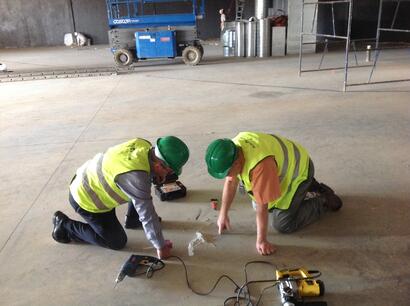
Identify any structural expansion joints. Structural movement will affect a vinyl installation and it is important to ensure the correct expansion joint covers are used over all the expansion joints to avoid any after-the fact comebacks.
Have saw cut joints been made? How deep are they? When laying the screed topping, saw cut joints may have been specified to prevent cracking whilst the screed is drying. Best practice is that saw cut joints are approx. 40mm deep and that they were done with the floor plan and design considered.
Is the screed level, smooth and contaminant, dirt and dust free? Vinyl will show imperfections in the screed and this step in the process is critical in producing a quality finish.
What thickness self-leveller was applied? Is it per your specification? As the screed levelness is so vitally important and given the fact that realistically, there are very few contractors in the country today that can deliver a Class 1 screed, be sure to specify a self-leveller. Specify at least a 5mm thickness even though we recommend assessing the substrate to determine what thickness of self-leveller is required to attain an average of at least 5mm.
Is the screed soft or powdered and are there any visible cracks? The screed must comply with at least 25MPa strength. Ensure there are no hollow patches and check for any cracks which could result in delamination of the screed
What is the moisture content of the screed at 40% depth? Vinyl and a wet substrate are archenemies. We recommend using a reputable moisture reading instrument such as a Protimeter or a Wagner meter which enables you to be able to read at depths of 40% and ensure you have no moisture issues. It is important to determine the moisture reading at this level as generally, the surface moisture evaporates fairly quickly but the moisture deeper within the screed may take longer to evaporate. It is guaranteed that moisture will rise to the surface once you install vinyl because of the moisture pressure equalising within the screed.
Check surrounding areas for indication of excessive ground moisture ie. vlei, slopes, clay etc. Ground conditions in the area can affect the moisture seeping into the structure.
Be mindful of the temperature at the time of installation. The ambient temperature affects the adhesive curing period in the winter months. It is common to have installation issues at 12ºC and below and it is advisable to consult your adhesive and screed manufacturer to advise on best practice for their product.
What was the ventilation like over the drying period? Poor ventilation causes adhesives to take longer to flash off, self-leveller longer to dry and causes a screed to powder. Excess ventilation is also not ideal as it could cause the screed to dry unevenly and settle differently, causing cracks and unevenness.
Is the correct material and adhesive on site? Check colour, batch and roll numbers. It is common to experience some colour variation in different batch numbers. Ensure you have received stock from the same batch number and insist on sequential roll numbers. It is also very important to note the manufacturer’s recommendation on the correct adhesive to use per product, as an adhesive failure could result in the flooring manufacturer voiding their product warranty.
How were these rolls stored? Has the material been rolled out and left to relax and acclimatise? Make sure to check the manufacturer’s recommendation as to product storage. Sheeting requires rolls to be stored upright whereas rubber stores flat. LVTs should not be stored in boxes of more than 5 boxes high.
INSTALLING VINYL FLOORS – A DO IT YOURSELF GUIDE
It’s week 5 of the One Room Challenge! Yikes, did these last few weeks fly by! This week was all about installing vinyl floors. I have been wanting to replace the old carpeting in our home for a very long time, so when the day finally came to rip those out and get these beauties installed, I was beyond thrilled!
PLANNING:
Most importantly, you will want to do your research and pick the right floors. A blogger friend recommended Lifeproof Luxury Plank Flooring (previously referred to as Allure ISOCORE, they are currently undergoing a name change) to me. The first thing I asked about was installing the underlayment. I was shocked when she told me that these floors had the underlayment built right in, completely eliminating that whole step! Honestly, I thought it was too good to be true and I questioned the company on it, and they assured me that it is indeed true. That alone makes these floors stand out, saving you time, money and labor.
PREPARING SUB FLOOR
By subfloor, I mean whatever was under your existing floors before. When we pulled up the carpets we found staples attached to the wood boards underneath. All of these must be removed prior to installing. It has to be a clean, smooth surface. This was the worst part of installing the new floors, you can read about how to remove carpeting here
FIX SQUEAKY FLOORS
This is the time to fix those annoying squeaky floorboards. When you find a squeaky spot, simply drill a drywall screw in the subfloor next to the nail in that area. It’s easy and it works!
INSTALLING VINYL FLOORS:
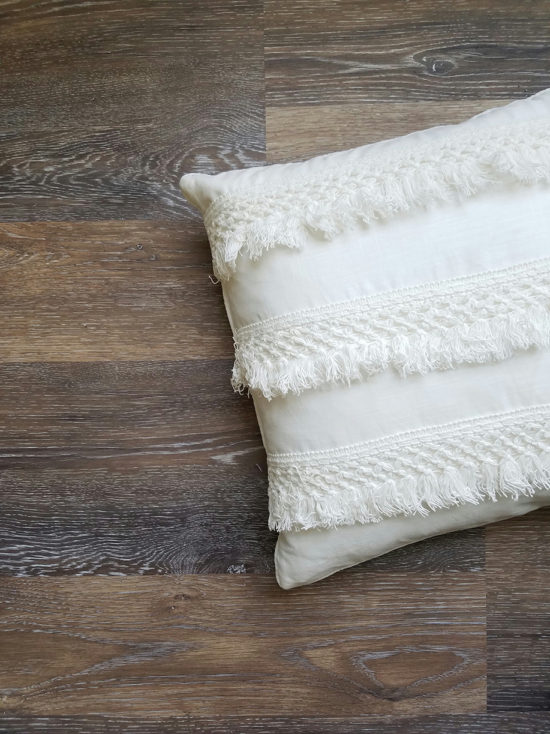
My husband really liked the finish on the Lifeproof Multi-Width Walton Oak Luxury Vinyl Plank Flooring so that is what we chose. (You can also check out my friend Tara’s choice of Lifeproof floors in the Seasoned Wood finish). I liked the varied wood tones of the wood and the different sized planks. When installing there are several patterns you can make with the multiplanks, so you will need to plan ahead before you begin so that you have an idea of your layout. None of the patterns are complicated to do.
What is Luxury Vinyl Plank Flooring?
Pros and Cons of Luxury Vinyl Flooring (LVP and LVT). And, what is Luxury Vinyl Plank Flooring? What about Engineered Vinyl Plank?
As you’ll see, vinyl has come a long way since its original introduction in the 1930’s. There are now options that look and feel so real, many mistakenly think they are hardwood
What does LVP stand for? What does LVT stand for?
First, LVP stands for Luxury Vinyl Plank and LVT stands for Luxury Vinyl Tile. As the name implies, Luxury Vinyl Planks look like planks of hardwood floors; and Luxury Vinyl Tile looks like Tile (or natural stone). They are individual pieces of vinyl (not sheet vinyl), so they look very similar to the real thing. Most luxury vinyls are waterproof (or highly water resistant).
Now, there are multiple types/forms of Luxury Vinyl and different grades, as I’ll discuss below. (The cheaper ones are often water resistant rather than waterproof.) And, you are more likely to find cheaper ones and knock-offs in the big box stores, so don’t be fooled.
What is the definition of EVP?
EVP stands for Engineered Vinyl Plank. It’s a segment of Luxury Vinyl Flooring. Engineered Vinyl Plank (EVP) has an incredibly realistic hardwood look (and feel) and is exceptionally durable. It’s waterproof and has a strong high density fiberboard core.
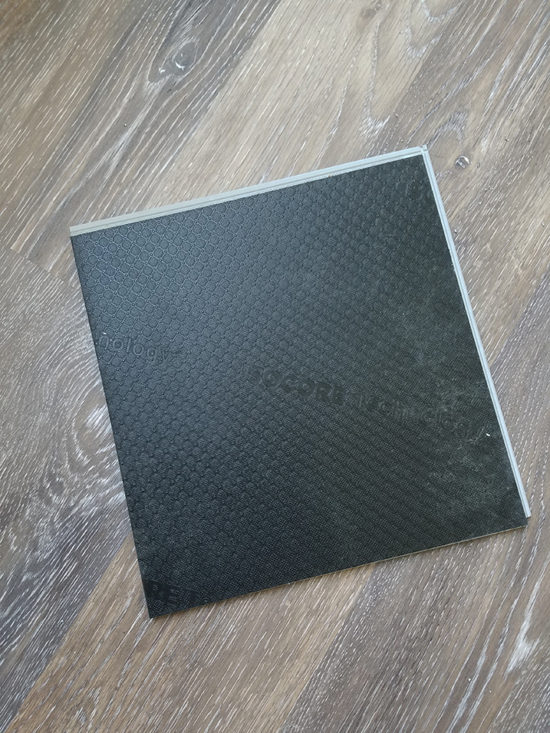
Engineered vinyl plank is much thicker than the typical glue down vinyl. It’s usually 8 mm thick, so it’s similar to an engineered hardwood (or laminate flooring). Like engineered flooring, it’s constructed in layers. The top layer is vinyl, the middle is a high density core board and usually there is an attached back underlayment (e.g. cork) for more cushioning. Like laminate, these floors are clickable so they are easy to install.
SELF-ADHESIVE VINYL TILES – HOW TO GUIDE
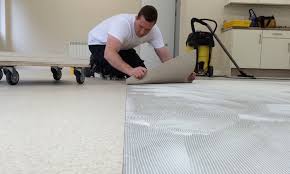
You’re already convinced of the first-class look that a tiled floor has to offer, but at the same time shy away from the disadvantages of the heavy and cold stone tiles? If you are also looking for a very simple installation option, then self-adhesive vinyl tiles are just right for you! Vinyl flooring is not only available in a slim plank format, vinyl now also passes as a handy tile. The surface of authentic tiles is reproduced completely and in detail, so that there is no difference in appearance.
In addition to the aesthetic appearance, laying is one of the key benefits of the self-adhesive vinyl tiles. These can be easily and quickly laid to the ground and do not require the help of a professional. Now, if you’re wondering how to lay this versatile vinyl floor, pay attention! We will explain how to proceed in order to achieve an optimal and appealing result. In a few steps you will finally obtain your new dream floor!
LAYING VINYL FLOOR TILES – WHAT DO YOU HAVE TO PAY ATTENTION TO?
Everyone already knows how to lay laminate tiles. The laying of tiles is difficult, but no longer a mystery. When it comes to self-adhesive vinyl tiles, things will look different! It is a practical alternative to the simple click mechanism, which definitely deserves more attention.
Vinyl tiles are not only a wonderful alternative to boring stone tiles, but you also get the self-adhesive installation method saves you a lot of time and nerves. Thanks to the practical adhesive backing, the vinyl tiles can be attached to the surface in an unusually simple way. The best part is that you do not need a professional! However, some things have to be considered in advance, so that no problems arise later. In order to guarantee that your new floor is absolutely even and beautiful
PROPER PREPARATION – THE NUTS AND BOLTS OF INSTALLATION
Before laying of self-adhesive vinyl tiles can start, some preparations must be made. First, make sure that you have all the tools you need for the installation. Since you have opted for self-adhesive vinyl tiles, you need very little here. A carpet knife, a metal ruler or similar and a measuring tape will suffice in order to lay the vinyl tiles safely.
RIGID FLOORING VERSUS VINYL FLOORS
All waterproof vinyl floors fall under one category called resilient flooring. Each type of resilient floor has its own unique construction, but the one thing they all have in common is P.V.C, (polyvinyl chloride). Each of these floors will have a percentage of PVC in them of vary amounts. PVC is why some refer to resilient floors as waterproof.
PVC is also known as plastic or vinyl, and it has been around for decades, but the new category of flooring, called M.L.F. (multi-layer floors) has changed the resilient flooring category forever. These floors are not like anything your mother or grandmothers had in their kitchen or home. Technological advances have made it possible to create a very durable, waterproof, and fashionable resilient floor that looks like real wood, linen, or stone
For this article, we will focus on the difference between rigid flooring (MLF) and vinyl floors (PVC) floors, because this is an area in which there has been some confusion and misinterpretations of the products. When considering any kind of PVC floor, there are six points you need to consider. 1. Health 2. Dent Resistance. 3. Dimensional Stability. 4. Installation. 5. Telegraphing and subfloor. 6. Fashion. Why is fashion last? Fashion or style is subjective, and it is the one thing both products can deliver, regardless of the construction of the resilient floors.
Construction: Vinyl floors are made up of PVC, additives for flexibility, and aggregate for density and durability. However, the PVC that is used to make the vinyl floor is essential. 100% virgin vinyl is the best choice for your health, and for the floor’s durability and stability. It means there is no recycle vinyl content in the construction of the floor, and it is Ortho Phyllite free, and free of heavy metal contaminants. This is very important to look for when buying vinyl floors. Ortho Phyllites are considered to be harmful to people and pets. This is why 100% virgin vinyl is the only kind of PVC vinyl floor you should have in your home. Better safe than sorry as the saying goes.
Dimensional Stability: Expansion and contraction is a factor in all flooring, including vinyl floors. Vinyl floors will contract and expand and must be acclimated to the environment for at least two days before installation. This may be challenging for meeting tight construction deadlines.