New Ceiling Fan and Tips to Install your
Own
It worked just fine but wasn’t entirely our
style. The wood matched the color of our hardwood floors before we stained them
darker. So this light wood fan just didn’t really seem to go with anything else
in the house
At night I would lay in bed and stare up at
it thinking, “I have to get a new fan!” I would also think, “Dang. I need to
get up there and dust. I can see the dust bunnies from down here!” My least
favorite place to dust…
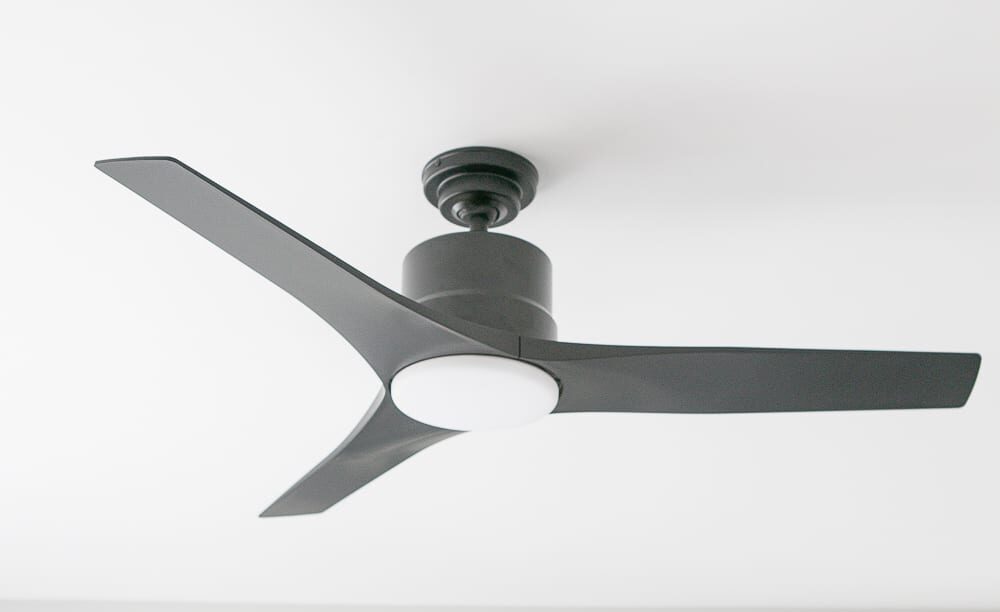
Well, I’m so happy that I finally followed
through on this task and we now have a new ceiling fan! I’m not gonna lie, I
had every intention of making this a “How to Install a Ceiling Fan” post. But
then once I installed it and realized how many steps there are…I decided to
just offer some of my tips and tricks that I learned along the way. Plus every
ceiling fan will come with a different set of instructions, so I figured a
step-by-step tutorial on how my fan was installed might not be as helpful.
First, find the right sized fan for your
space. The bigger your room, the bigger the fan you’ll need. Here are some
general guidelines…
36″ diameter = Longest Wall in Room is <
12 ft
42″ diameter = Longest Wall in Room is
between 12-15 ft
52″ diameter = Longest Wall in Room is >
15 ft
Make Time During the Day
I assumed this project would take about 1
hour from start to finish, but I definitely underestimated the time. Give
yourself at least 2-3 hours of uninterrupted time to get this project done. I
also advise doing this during the daytime since you will need to turn the power
off in the room and you’ll need light to see what you’re doing!
Enlist a Buddy
When it comes to DIY projects like this
one, I often prefer to work alone (or sometimes with Bridget). However, this is
definitely a 2-person job. You may need someone to hold the old fan while you
disconnect the wires, you’ll need a helper to hand you things while you’re up
high on the ladder, and you’ll want a buddy to help you lift up the new heavy
fan to the ceiling.
How Many Blades Should Your Ceiling Fan
Have?
With summer now in full swing, ceiling fans
are one of the best upgrades you can make to your home. They are far more
effective than pedestal fans and operate at the fraction of the cost of air
conditioners.
But when choosing a ceiling fan, it can be
difficult to work out the best option for your home. There are so many
different styles and configurations on offer that it can be difficult to
choose. One question we are often asked is how many blades a ceiling fan should
have. This is a great question, as the number of blades does affect a room, as
well as efficiency of the fan, blade pitch, balance and motor.
CEILING FAN BLADES
Your ceiling fan blades impact the quality
and performance of a fan, though modern ceiling fans don’t tend to have many
major differences in job performance. In fact, advancements in residential
ceiling fan design, low drag blade shapes, pitch, and balance ensure your
ceiling fans do their best job in your home. Whether you choose 3, 4 or 5 blades,
you can rest assured that your ceiling fan will perform well in your home.
Fewer Blades for Less Drag
When a fan has fewer blades, there is
generally less dragon on the motor. This means it can go faster and more air
more efficiently. As a result, there is more airflow and a better wind chill
effect. This makes your face feel cooler. Finally, the specific shape of the
blades ensures that air is being picked up and moved around your home.
Do You Need a Breeze or a Gust?
A fan with fewer blades usually turns
faster with a stronger motor. This creates a greater wind chill effect. If you
are looking for a gentle breeze, you might need a fan with more blades.
How to choose the best ceiling fan
What size ceiling fan?
It might sound obvious but the basic rule
is the larger the room, the bigger the fan required. For a small room (up to 20
square metres) fans with blades up to 122cm are ideal. For a bigger room,
you’ll probably want to look for a fan with blades that are 130cm or more.
Take control
Generally, there are two options when it
comes to controlling your fan. Either a wall switch with a dial to vary the
speed, or a remote control if access to the roof and wiring is an issue
Three or four blade ceiling fans?
Most fans have either three or four blades
and are made of either plywood, metal or plastic. The number of blades has no
effect on their ability to cool a room but timber and plastic blades do tend to
be a little quieter than metal.
Finish and colour
Another factor worth considering is how your
fan is going to look within a room, as they can become a dominant feature. This
is not too much of an issue if it’s going to be installed in an outdoor area,
but for indoor fans it’s worth thinking about how it will complement your
colour scheme and décor.
AC or DC ceiling fan?
Ceiling fans generally use either AC
(alternating current) or DC (direct current) motors. DC models are becoming
more and more popular because they are more efficient to run and use less
energy than AC models. They also tend to offer a greater level of control, with
up to seven speed settings available.
How to Install a Ceiling Fan
Before You Buy
To find the right size and downrod length
of your new fan, measure the length, width, and ceiling height of the room you
plan on placing it.
How to Install a Ceiling Fan on a Flat
Ceiling
If you are replacing a ceiling fan with a
similar style, installation should be simple. If you are putting in a new
ceiling fan or replacing an existing light with a ceiling fan, make sure the power
required to operate the fan will not overwhelm the existing wiring. Consult a
contractor if you are unsure.
Turn off Electricity to Room
Turn off the electricity to the room where
you are installing the ceiling fan. Confirm the power is off by flicking the
light switches. Remember which switch controls the fan for testing purposes
later.
Remove Blades
With a screwdriver, remove the blades of
the existing fan.
Disconnect and Remove Fan
Unscrew the screws at the base of the fan
where it meets the ceiling. Pull the cover down away from the wires. Remove the
wire nuts and the connections between the fan and the wiring. The entire fan
will come out of the ceiling so be ready to support its weight. Unscrew the
brackets that support the ceiling fan.
Things To Know Before Buying a Ceiling Fan
Energy Savings
Ceiling Fans are great for improving room
comfort while at the same time producing energy and cost savings. Homeowners
are experiencing higher energy costs and it’s only going to get worse. There has
never been a better time than now to consider the purchase of a ceiling
fan(s)and to enjoy both the aesthetic as well as energy saving benefits of
owning a ceiling fan. In summer ceiling fans allow you to feel cool without
having to turn the air conditioning full-on therefore saving energy and money.
Setting your thermostat higher with a ceiling fan running can save up to 40% on
air conditioning bills. Studies show this can make a room feel up to seven
degrees cooler. In winter ceiling fans should be reversed and used to push the
warm air down from the ceiling to keep the heat in the lower part of the room.
This is especially important in rooms with tall ceilings, resulting in energy
and money savings from recirculating the warm air allowing one to set the
thermostat lower.
Larger Rooms Need Bigger Fans
For maximum performance, choose the right
fan to fit your room size. In a room up to 50 square feet, like a bathroom,
choose a 29″ fan. Breakfast nooks and laundry rooms up to 75 Sq. ft.
choose a 36″ blade span. Medium size rooms up too 100 square feet can fit
fans from 36″ to 42″. Standard bedrooms and family rooms up to 400
square feet work most efficiently with fans that are 50″ or 52″.
Great rooms or large areas over 400 sq. ft. require a ceiling fan with a
54″ or larger blade span. For long or large rooms, you should consider
more than one fan to handle your cooling requirements. For maximum comfort, the
fan should be placed as close to the center of the room as possible. Keep blade
tips at least 18 inches from any wall. Ceilings Lower Than Eight Feet. Use the
Ceiling Mounting Kit or go with a Snugger or Hugger model to achieve the
desired seven-foot blade clearance. For
ceilings above eight feet, the fan should be hung by a downrod extension so
that the fan is eight or nine feet from the floor. You will want to hang it at
this level since the higher the fan is hung above eight feet, the less air
circulates near the floor.
Bathroom and Outdoor Ceiling Fans
Look for a bathroom ceiling fan
specifically designed and UL-listed for damp locations. Bathroom Ceiling Fans
start at 29 inch blade spans since smaller rooms require less air movement and
space is usually limited. Want one for the covered outdoor patio? Opt for an
Outdoor Ceiling Fan that this is UL-listed for wet locations. Outdoor ceiling
fans can also be used indoors. They have protective motor coverings to keep
moisture from corroding the motor.
Fan Blade Pitch and Size
Fan blades determine the amount of air
being circulated throughout the room. Fan blade pitch is usually between a
12-15 degree angle for optimal circulation. Fan blades must be weighted and
matched as a balanced set to avoid having your fan wobble. Ceiling fans with
less than a 12 degree angle will not circulate air as well and be less
efficient. The greater the angle or higher the pitch of the blade the more air
circulation you will have in your room.
The Motor
The motor is responsible for producing
quiet operation while driving the blades for air movement. Look for
high-quality motors with heavy-duty windings and sealed bearings that are
permanently lubricated. Smaller, less powerful motors found on lower quality
fans may produce higher operating temperatures, lower air circulation and
noisier operation. Motors are designed to work flawlessly for long periods of
time and should have a long lasting life