Drywall Repairs Damage

Causes Of Drywall Damage

Fixing drywall can be a headache for a homeowner. Though you don’t have to fix the damage yourself, you still have to worry about it reoccuring

Plumbing Leaks

One of the leading causes of broken drywall is water damage. If your plumbing is older or has been improperly installed you may run into some major issues further down the road. One of these is water damaged drywall.

Poor Fastening

When your drywall was installed it was most likely attached via joint fastening tape. As time goes on, this thick tape can loosen due to moisture or age, and start to buckle the drywall it’s holding together. This will show up very obviously in your walls.

Cracking

Cracks can happen in poorly installed drywall. It most often occurs in ceilings. The moment a crack is noticed, you should absolutely contact an expert to come and repair the damage. Cracked drywall is a safety issue. If you notice cracking happening often, you should have your roof inspected. Sometimes it is also caused by your house settling.

Termite Damage

Termites are a major issue for lots of homeowners. If you notice termite damage immediately call an exterminator. Termite damage can be identified by pinholes, a hollow sound when you strike the wall, damaged paint and wood damage.


How to patch drywall.

I’d like to rephrase that.  Classifying my kitchen renovation as an “event” seems wrong.  A bit of a narcissistic  exaggeration, heh.    It would be more appropriate to say the renovation has been an ass pain undertaking.  The completion of it will be an event!  Complete with contortionists and ponies if I have my way.

I’ve had to hire only 4 people to do things around my house in the past 5 years or so.   The nice man Tim who unclogged my pipes, Dave who did my electrical work, Grant who is installing my kitchen and Kyle … who drywalled my ceiling.  None of those phrases are euphemisms.

All of these were jobs I couldn’t do myself.  I tired to fix my plumbing but wasn’t successful, I tend to shy away from elaborate electrical work or anything that might kill me if done incorrectly, and I don’t have a clue about how to hang cabinets in  a house that has walls that look like you’re seeing them through a funhouse mirror.

Drywalling on the other hand I can do.  What I can’t do is drywall a ceiling.  I’m too little, drywall is too big and it brings out the swear words in me.  Words like snarklefart. So in the spirit of “Save and Splurge” I hired Kyle to drywall the ceiling, while I did all the other drywalling that needed to be done in the kitchen.  If it wasn’t on the ceiling, I was doing it

I know. Drywalling scares people. Putting nail holes in it scares people, knocking a hole in it scares people and putting anchors into it scares people


HOW TO PATCH DRYWALL

It’s inevitable. No matter how careful you are, holes in your drywall are going to happen. Fortunately, no matter how extensive the damage, it is fixable.

Step 1: Cut a Square Around The Damage

Cut the hole into a square or rectangular shape using a keyhole saw. Now cut a replacement piece of drywall 2″ longer and 2″ wider than the hole you just made. Use a tape measure to make it the right dimensions.

Step 2: Make a Patch

Create a patch to fill in the hole. Lay the replacement piece of drywall on a flat surface with the backside facing up. Measure in 1″ from all four edges and draw a line using a pencil. This should form a shape the size of the hole. Using a straight edge and utility knife, cut through the backside paper and the drywall gypsum. Do not cut the front-facing layer of paper. Using a putty knife, peel away the backside paper and gypsum layer. Be careful not to tear the front-facing paper. The smaller part of the patch should fit into the hole. The paper edge should extend 1″ beyond the hole.

Step 3: Apply Joint Compound

Apply a thin layer of joint compound around the hole. Place your patch into the hole. Using a putty knife, work the paper edge down into the compound. Feather the edges of the compound and allow it to dry. Sand lightly with a fine-grit sandpaper and apply a second layer of joint compound to finish the repair.

PATCH LARGE DRYWALL HOLES (6″ TO 12″)

Step 1: Square Off the Hole

Use a keyhole saw to form the hole into a square or a rectangle. Holes up to 12” require a slightly different repair that provides more support than smaller holes.

Step 2: Create a Patch Larger Than the Hole

Cut a piece of drywall that’s 2” larger than the hole to be repaired. Using a drill, create two small holes through this piece of board, feed some string through and tie both ends of the string to a stick (tie in the middle). Allow for about 8″ of string between the board and the stick. The “stick side” of the board will be the front. The stick will be used to hold the patch in place. By twisting the stick, it applies pressure to the rear of the board to steady it in the hole.

Step 3: Place the Patch

Place the patch by first applying a smooth coat of cement adhesive around the edges of the piece of wallboard material. Insert the patch into the hole and position it so the cement adhesive firmly grips the solid area around the rear of the hole. Turn the stick clockwise, twisting the string and increasing pressure against the patch board at the rear of the hole. This will hold the board firmly in place until the cement adhesive dries.


Steps to a Permanent Fix with 3M Patch Plus Primer

Do you have a crack in your drywall that keeps coming back? Today’s post will help you fix this annoying problem in easy steps using 3M’s Patch Plus Primer.

This weekend I was cleaning out the guinea pig cage that sits in our living room (did you know guinea pigs can live from 5 to 8 years, what the!!!) and noticed a crack in our wall under the window. Apparently the previous homeowners tried to fix it since there was evidence of old joint compound around the crack.

Dealing with old rental homes has taught me a thing or two about drywall and plaster. After reading this post I guarantee you’ll be able to permanently fix any drywall crack in no time.

Apply Fiberglass Mesh Tape to Your Drywall Crack

One of the biggest mistakes anyone can make is to just add joint compound or spackling to the drywall crack. Over time the crack will come back because the compound or spackling will never win the fight between it and your house settling

Add a Thin Coat of Patch Plus Primer to the Drywall Tape

3M Patch Plus Primer is great for repairing cracks or holes in drywall because it doesn’t require a primer coat like traditional joint compound


Can I fill a drywall hole with something and reuse the hole?

I made a mistake with drilling a hole in the drywall. It’s off by about 1/4-1/2 inch. The new hole will be really close to the old hole, or knowing my poor drilling skills, it will overlap the old hole. Someone told me I can use joint compound or something to fill the hole and reuse the hole. However, when I went to OSH, the worker said structurally, we can’t refill a hole and reuse it and that the screw/anchor will eventually get loose and fall out.

Is my friend correct that I can reuse the hole or is the worker correct that structurally we can’t reuse the hole? EDIT: I’m trying to drill holes for screw to hold a curtain rod and use anchors in the drywall. The anchors are the plastic anchors that came with the curtain rod set. I don’t think the rod and curtains weigh that much but the store worker said the filled in drywall won’t be as strong as untouched drywall.

I didn’t measure the line or drill the hole correctly b/c one of the end brackets holding the rod is like 1/4-1/2 inches too low (stupid me). I COULD move it out (or in) 1-2 inches to the left or right but then it doesn’t look symmetrical, which is why I want to just fill the holes and re-drill a hole 1/2 inch up to line everything up but if the filled in hole won’t hold the anchor, then that won’t do

Joint compound usually bonds fairly well to the gypsum inside drywall panels. However, you must get it thoroughly filled to make good contact. Also, standard joint compound shrinks substantially, so you’d be better off with a setting-type product

If you press the compound in adequately and let it dry or cure fully, you’ll be able to drill a new hole at the correct location. You’ll want to start with a small, sharp bit to be sure that it doesn’t “walk”, or shift position. Anchor your drill well to help with this.

Qualities Of Good Divorce Lawyers

Signs You Should Hire an Attorney for Your Divorce

Getting divorced in Virginia can be a complicated endeavor. If you have children, assets, or any other likely points of dispute you should contact a Virginia divorce attorney for women. If you’re getting divorced in Virginia, you might be wondering whether you need to hire an attorney. While the idea of having a Virginia divorce attorney for women on your side can seem appealing, you may not know much about working with a lawyer and be unsure of what to expect.

In the age of the Internet, everyone seems to be a do-it-yourselfer. Whether the project is a home renovation or a divorce, there seems to be a book or a kit that tells you exactly how it can be done without a professional. This might sound like a good deal, but as anyone with DIY home repair experience will tell you, embarking on a project when you don’t have the knowledge or experience required can end up being a disaster.

The same is true for getting divorced in Virginia. Individuals who attempt to do their own divorces often run into unforeseen complications and end up regretting their decision. It’s important to evaluate your case and know what you’re getting into before you begin.

Signs You Should Consult an Attorney

  • You foresee a child custody dispute. Having kids changes your life forever, including the way you approach a divorce. When you have kids, the stakes are high, and unfortunately couples often end up fighting bitterly over custody. It’s true that some couples are able to coolly negotiate the terms of custody and visitation, but this is not the norm.
  • You and/or your spouse have more than a few thousand dollars in assets; especially if there’s a marital home involved. It’s wise to have an attorney who can help make sure that you’re treated fairly when it comes to division of assets.
  • You and your spouse own a business together. This scenario can be quite complicated in a divorce. An attorney will know how to navigate the confusing details, and can enlist the help of financial professionals like appraisers and consultants.
  • There was domestic violence or abuse in your relationship. The emotional dynamic that’s present when one spouse dominates and intimidates the other makes it impossible to communicate on equal ground. When getting divorced in Virginia, the abusive spouse can easily “negotiate” the other spouse into an unfair deal if no legal counsel is involved


Things You Should Include In Your Parenting Plan

Every family is unique therefore your parenting plan should be designed around the needs of your family. You will include a number of children you have as well as their ages, schooling needs, and so on. Some specific points you should cover include:

  • Schedule – This is one of the essential elements. You and your co-parent must include details about how you plan to meet your child’s physical needs. Some factors such as your children’s age and school schedule can impact the parenting schedule. The most important thing to keep in mind is that your children need sufficient time with you and your ex-spouse. Parents must create a schedule that allows children to spend equal time with both parents.
  • Special events – Some events such as the holidays, birthdays, school recitals, and so on, may suffer some interruptions. You need to decide where your children will spend Thanksgiving, Christmas, etc.
  • Expenses – Who will cover the costs? This is a question only you and your former spouse can answer. Some expenses you can split 50/50 while others are a bit difficult to figure out. You can always use a tool to write down child-related costs. It can help you and your co-parent provide a financially stable environment for your children, whether they’re staying with you or with your former spouse.
  • Making important decisions – It is best when both parents are actively involved in the children’s lives and in making decisions regarding their education, discipline, religious practices, health care, etc. You can talk to your co-parent about these big decisions and trace a parenting plan that includes how you will handle these major decisions.


Divorcing Women: Five Signs You Might Need A New Attorney

In a divorce, all negotiations and deal points go through your attorney. If he or she is a poor negotiator, an unimpressive litigator or simply fails to understand the complexities of your case, your financial future could be in jeopardy.

So, if you’re dissatisfied with your lawyer, should you hang on, or let go? Breaking up with your husband is unpleasant enough – do you have to break up with your divorce attorney, too?

Let me help you work through that decision. As I see it, here are the top five signs that you might be better served by a different divorce attorney:

Your attorney doesn’t return calls or answer your questions.

Obviously, your attorney will not pick up the phone herself every time you call, nor will she be able to respond within the hour every time you have a thought or a question. Keep in mind that divorce attorneys are often in court –especially in the mornings –and if they are in trial, they can be at the courthouse all day for a week or more, in some cases. Even so, you should not feel that your lawyer is unresponsive. Being busy is one thing, but ignoring you when you need answers is not OK.

How to avoid it: Make your expectations about communication clear from the outset. Maybe it doesn’t bother you not to talk directly, but even so, you expect emails to be answered within twenty-four hours. On the other hand, maybe you hate email and want frequent telephone updates. Whatever your preferences, state them up front. Also, please remember: Your attorney is not your therapist, and you can’t presume she’ll be able to help you cope with personal issues the way a trained counselor will. You may need to adjust your expectations, or you may decide this attorney is simply not someone you can work with.

You feel intimidated –or even bullied –by your attorney.

Let’s face it, lawyers – and particularly litigators – can be very intimidating people. They need to be! You don’t get to be a successful attorney without some ability to intimidate or outdo an opponent in court. You want your attorney to have impressive knowledge, experience and courtroom presence. This person cannot be a shrinking violet.

However, it’s difficult to work with someone who talks down to you. If you get a “don’t worry your pretty little head about that” vibe from your attorney, you’re not being taken seriously, and that is a problem. Even worse, I’ve had clients whose attorneys were almost as verbally abusive as their soon-to-be-ex-husbands.

How to avoid it: Educate yourself so you have a working knowledge of divorce basics, like the difference between separate and marital property and how assets are divided. And remember: Your attorney works for you, and not the other way around. If your lawyer doesn’t seem to recognize the nature of your relationship, it may be time to walk.

You leave the lawyer’s office feeling worse than when you came in.

No divorce attorney should promise you the moon. You likely won’t get every last thing you ask for in a divorce settlement negotiation –and that’s precisely why it’s a negotiation, not just a list of demands to be filled. On the other hand, you don’t want the sense that your attorney has no ideas or isn’t making a proper effort on your behalf. If you don’t have confidence in your lawyer’s ability to negotiate a fair settlement, it’s no wonder you will leave their office feeling distinctly hopeless.

How to avoid it: During your initial interview with prospective attorneys, don’t focus on the particulars (“I really want to keep the house,” e.g.). Instead, state your goal (“I want to come out of this divorce in the best possible financial shape”) and ask your prospective attorney to suggest a plan of action. Discuss the strengths and weaknesses of your case, and emphasize that you want to understand best and worse-case scenarios equally. Also ask what advice this attorney would be giving your husband, were it him and not you across the conference room table.


Essential Signs of a Good Divorce Lawyer

Divorces are not a pleasant experience. Especially if we face them alone. If there are numerous assets and liabilities to be taken care of, as well as children, things get even more complicated. That’s why it’s advisable to seek the help of a professional divorce lawyer.

But how to choose one in the ever-growing sea of divorce lawyers? One that’s going to lend us their helping hand during a tough time like going through a divorce. One that’s not going to be judgmental but helpful.

The top 7 signs of a good divorce lawyer. They’ll help you choose yours much more easily.

They Have a Website.

Having a website is essential for a couple of reasons: 1) You can get to know the lawyer by reading the information they have provided in their About section or on their blog. By the way the website is designed and how the information is presented, you can see whether the lawyer is a real professional, and whether it’s easy to work with him/her. 2) You can read client testimonials, which leads us to sign #2.


The Lawyer Has Good Customer Reviews.

Feedback from past clients is one of the most important things you should consider before hiring a divorce lawyer. If they have many reviews, and the majority of them is positive, that means the lawyer might be a good fit for your specific case, too.

They’re Active on Social Media.

While this is not necessarily a must, when a lawyer devotes some of their precious time to expanding their presence online, that’s definitely a good sign. And it’s another way to get to know the lawyer before even considering giving them a call.

Read the lawyer’s posts on Facebook, Twitter, and LinkedIn, sign up for their newsletters, and see how they communicate and respond to comments. This will be helpful to decide whether you’ll be a good fit.

A good listener

While you might want your lawyer to listen to your pain and sadness, that is not their job. They are not a trained therapist and using them as one is a gross misuse of time and money. What might seem immensely important to you might not have an impact on your case. With that being said, it is vital that a top divorce lawyer in The Woodlands is a good listener – they just need to listen for different information. Your attorney needs to understand your goals and needs legally.

Honest

Although it can be difficult to hear the truth, especially if it isn’t in your favor, a top divorce lawyer in The Woodlands needs to be honest. This applies to both your case’s outcome and lawyer’s fees. A good lawyer will never lie just to save you from discomfort, and they will never be dishonest about payments. Certain types of representation have flat fees, but most types of legal matters vary. It is a sign of good ethics if your lawyer gives you a range for how much their time and services will cost.

Objective

While it is important for your lawyer to be both a good listener and honest, they also shouldn’t empathize too much with your pain. A top divorce lawyer in The Woodlands is able to stay objective while seeking the truth at all times. Your relationship with your lawyer should be professional and based on trust and facts.

Respect

An objective lawyer will always ensure quality customer service. A sign of a top divorce lawyer in The Woodlands is their ability to make working with them enjoyable. You, and all other parties involved in the case, should feel respected and included throughout the entire process. This includes having a quick response time and great communication skills.

Things To Consider In Electronic Leak Detection

Water Leak Detection

Are you experiencing unexplained high water bills?

Water leaks can be difficult to find and are often in places which are either hard to get to or difficult to trace the source. Leaks can often occur behind walls or under slabs, in sewer pipes or stormwater drains, and can be the result of a blocked drain, burst pipe or faulty plumbing fixtures.

Types of water leaks

The fresh water coming into your home runs under pressure through the mains water pipe which means a burst pipe can quickly become a huge issue in your home. The waste water leaving your home through the sewer system (everything that goes down the sink, toilet, bath, shower, etc.) and the rainwater travelling through the stormwater drains is gravity fed which usually leads to slower leaks (unless it has been raining or your have a blocked drain)

With this in mind, there are generally 3 different types of water leaks:

Stormwater leak: Is this leak only occurring when it is raining? If so, it is likely a stormwater leak.

Sewer Leak: Does the leak have a bad odour? If so, it is commonly a sewer leak.

Water Supply: Does the water bubble up? If so, it is likely a water supply leak.

Finding the leak

Apart from high water expenses, there are many other signs to look out for that could indicate that your pipes have burst or you have a broken drain.

Checking the meter

Set aside a period where you won’t need water for at least two hours. Turn off all the taps throughout your property and home, and switch off any water using appliances (such as the dishwasher, washing machine and hot water system*). Take a note of the meter reading of your home’s water meter then re-read the meter after two hours. If the reading has changed you could have a leak in the mains water pipe.


Leak Detection

Have you noticed an unexpected rise in your water bill, but you don’t know why? Maybe your basement is flooded, or your wall is suddenly wet? You may have a leak you are not aware of, and you need experienced plumbers to determine the problem and conduct a prompt and efficient repair.

You can count on our leak detection Sydney to provide prompt and efficient plumbing service any time you need it. We will be at your place at the scheduled time to get your problem resolved. Our services are available 24 hours a day, so even if there is an emergency, you can be sure that we will be at your address as soon as possible.

Commercial Property Leak Detection

Pipelines in commercial properties may cause more problems than you can expect. Closing your company for a couple of days will cause you to lose valuable time and money. On the other side, if the leaks don’t surface immediately they can be hard to pinpoint, and you will have to pay the rising water bills.

Water and Gas Leak Detection

We have been working on different projects that included leak detection for water as well as gas pipelines. No matter if you started hearing noise from your water pipes, or you started smelling the gas, don’t hesitate to give us a call.

If left unsolved for a long time, water leaks can seriously damage your property, and there will be much more costly repairs, especially if it shows up near porous surfaces like carpets, wooden floors, drywalls, etc. Because of that, it is important to regularly check your pipelines and water utilities,


Leak Detection

Water Leak Testing, Leak Detection, and Pipe Leak Repairs

DFW Pipe & Plumbing & Plumbing specializes in under slab hot or cold water leak detection and location services. We are at the forefront of our industry and take pride that we can also offer our customers various types of repair options

The Signs of a Water Leak

These include the following:

Unexplained puddles of water appearing within a building or home

Wood floors that appear to be buckling

Warm spot on the floor

Standing water outside or even a soggy lawn

Unexplained hissing or a whooshing sound usually caused by water rapidly exiting at the leak location in the pressurized pipe

A steady or sudden rise in water usage and water bill increases

NOTE:

Due to pressure limitations within the pipe, the depth of the pipe and the surface above the leaking pipe, such as a concrete slab foundation or yard line, a homeowner may not hear or see the sign(s) of a water pipe or main line leak.

What Can a Homeowner Do…

To verify a possible water leak or just to make sure there isn’t one:

Ensure that all water is off in the home; such as: faucets & fixtures, dishwasher, washing machine, etc. etc.

Repair or shut off the angle stop where there are any dripping faucets and/or running toilets as this could also be a sign of a water leak

Inspect the gauge on the city water meter, movement on the gauge would indicate a water leak. Even if the city water meter gauge is not immediately moving, note the position and wait about 15 minutes and check the meter again, if it has moved, even the slightest, this could signify a very slow leak.

Water Leak Detection & Isolation

Plumbing will commence by verifying the existence of the suspected fresh water pipe leak(s) by performing a pressure test on the water system then proceed with pinpointing the location of the leak. Utilizing Electronic Line Tracing equipment ensures that a pipe is present and the path of the plumbing pipe is traced. Air is also introduced into the plumbing pipe (if needed), to aid in discovery. Then while operating Acoustic Leak Detection equipment where the sound is electronically amplified, we continue to track the amplification of the pipe leak while tracing the presence of the pipe in the slab to the location where the leak reverberates the loudest, pinpointing the location of the pipe and the under slab plumbing leak.

Once the plumbing leak has been found, suitable repair option(s) can be recommended and estimate(s) are provided for each type of repair, where the homeowner can choose what is suitable for their situation. These pipe repair methods are mentioned below.


Electronic Leak Detection

Many homeowners are surprised to know that sound can be the key factor when trying to find a plumbing leak. When a faucet is turned on it will create a sound as the water travels through a pipe in the plumbing (very obvious sound when a fixture is turned on upstairs).

If there is a leak in a pipe, then sound will also be created when the water pours out of the leak, and this can occur even if the leak is only the size of a pinhole. Obviously with a tiny leak the sound will not be loud like an open faucet, so for us to hear the sound of water movement we use modern technology.

As long as we can isolate a system and pressure test it, then leaks can be detected using electronics. Of course the more accurately we can pinpoint a leak, the less damage required to access the leak which saves time and money.

Electronic Leak Detection Equipment

This type of plumbing service requires expert plumbing techs with years of experience in leak detection. Streamline Plumbing uses modern equipment that will amplify the sound of moving water using microphones, digital amplifiers, and filters, which allow the leaking pipe to be identified at your home.

Electronic Line Location

Locating your sewer line is no longer a guessing game because Streamline Plumbing uses the best modern equipment to locate the elusive sewer line in a very short time. Most older homes have the sewer lines buried underground and can be difficult to find


LEAK DETECTION AND REPAIR

If your home has a leak in a water pipe, drain, or main line, it’s important to call a professional plumber experienced in leak detection and repair right away. Water leaks can cause serious damage to your home and furnishings, and some can even cause health hazards.

Plumbing Detect Leaks?

Visual inspection— This is what we start with to see if there are any signs that point to the location of the leak.

Sewer camera inspection— A small camera on the end of a device like a plumber’s snake is pushed through the pipes to find out where the leaks are.

Electronic leak location — A low-voltage device picks up and amplifies the sounds that leaks make. We can use electronic detection to find even small pinhole leaks in pipes and lines.

Pressure test — This can be done on the whole water system and can also be used for detecting leaks in sewer lines and gas lines.

Plumbing Repair Leaks?

Spot repair — The site of the leak is exposed for spot repairs. This could be done by opening up the foundation slab, accessing the pipe through a wall, or digging up a spot in the yard.

Re-piping — If a whole pipe or line is in bad condition, it can be replaced entirely.

Epoxy pipe coating — We only recommend pipe coating in unique situations, like patching small leaks in yards where plumbing runs under retaining walls. This method involves using an epoxy resin to coat the inside of an existing pipe to patch it.  If the pipes are not in perfect alignment or if there is a low spot in the line, epoxy pipe coating usually isn’t a good choice.

Pipe Bursting — Pipe bursting is a method of repair where a pipe sleeve is placed in the pipe then pressed against the walls of the existing pipe by a balloon. Pipe bursting is only used in select instances.  Improper sloping of a pipe and pipes that are not in alignment cannot be repaired using this technique

The most effective repair method for yard leaks is to dig down to the pipe to replace the bad section.  If a leak is repaired by a skilled plumber who uses quality materials, you’re unlikely to have a problem again. No matter where the leak is, our policy is to use the best method of repair to fix the problem for the long-term, while keeping disruption of your life to a minimum.

Want To Know How To Exterminator Bed Bugs

How to Get Rid of Silverfish and Everything Else You Need to Know

What is a Silverfish?

Silverfish are tiny insects, measuring a measly 13-25mm long. They can be creepy to come across in the middle of the night, as the three long cercei attached to their abdomen are often mistakes for stingers. Silverfish get their name from both their colour and the way they move – they have a light sliver, blue sheen and get around your house with a fishy wiggle.

How Do Silverfish Get in the House?

Despite their minuscule size, or maybe because of it, silverfish are master burglars. They’ll enter your home without breaking a sweat, invading through crawl spaces, foundation cracks, torn screens or large gaps under and around doorframes. Silverfish also stowaway in cardboard boxes and plastic containers, particularly if the box originally came from a silverfish infested area. If you’re trying to figure out how to avoid silverfish in the future, sealing up these potential entry highways will go a long way in controlling any invading populations. All it takes is a few minutes every week and a keen eye for detail, filling any cracks, gaps and holes as you go.


What Are Silverfish Attracted To Inside Our Homes?

Since silverfish are attracted to moisture, having a moist environment inside a home will make silverfish feel right at home. A humid environment, leaky pipes or fixtures, or any other condition that causes moisture or water build-up, will attract moisture-loving pests. But silverfish are also attracted to several other things, namely, things that they like to eat:

  • Silverfish love to eat a good book. And they don’t care if that book is something you plan to donate to Goodwill or a treasured keepsake that has been in your family for generations. Silverfish love to get inside a book and eat away at the glue that holds that book together.
  • Silverfish will also nibble on fabrics, especially if that fabric has food or drink spilled on it, or if it contains starches or adhesives. But they also enjoy chewing on cotton, linen, silk, and even leather items. If you have special clothing items stored away, such as a wedding dress, then it is not a good idea to have these destructive insects roaming around in your home.
  • If you are fond of your wallpaper, silverfish are even more fond of it. Silverfish love to eat the paste off of the back of wallpaper. This will eventually cause it to sag and peel off the walls, and put a small, or perhaps not-so-small, dent in your wallet when you need to re-paper or paint.
  • Pantry items. Silverfish love to chew through packaging, exposing food to the air. This will either allow the food to spoil or get stale or, worse, you could find yourself face to face with a silverfish floating around in your cereal bowl.
  • Old photos. Silverfish will sometimes eat old photos and, literally, deface them. If you have memories stored away in a box of old photos and you have silverfish in your home, know that those memories could be erased.


Common Mistakes Homeowners Make Regarding Silverfish

If you are wondering why silverfish have chosen your home, keep reading. Many homeowners don’t realize that certain conditions attract moisture-loving pests such as termites, earwigs, and silverfish.

  • Broken or obstructed gutters can cause water to collect along walls or foundations which will attract moisture pests.
  • Bushes or vegetation up close to a foundation can also cause moisture problems.
  • Leaky spigots make it nice and wet for moisture pests.
  • Holes, gaps, and cracks in foundations and walls are a sure way silverfish and other pests find their way inside.
  • Humid or moist areas in your home will make these insects feel right at home.


How to fight the infestation of silverfish?

Make no mistake, silverfish much prefer new homes than older. So no matter what type of property you found them, control means are the same.

The best way to fight against silverfish is to maintain moisture free places , for example clog the pipes leak, redo the window seals if necessary. In short, avoid water seepage. Remember to vacuum regularly and rigorously in corners. Also, clean the table scraps and crumbs, even in the most hidden and less accessible places, such as drawers, bottom of wardrobe, etc.

In addition to repel silverfish, as you move away from other insects such as cockroaches or ants that are attracted to the same things.

– Biological Control

It is easy to get rid of silverfish, at the same time you have a controlled environment using the above advice.

For the biological control against silverfish, you can use diatomaceous earth, a non-toxic to humans or pets. Used for its abrasive properties on insects, the insecticide bio can be sprinkled along baseboards, behind furniture and under appliances, under the sink, along the walls and on the route taken by silverfish. So that insects will scrub their bodies, they will die, but not automatically by dehydration.

– Homemade Methods

If you have found a small amount of silver fish inside your home or another building, you can try a homemade tip to capture pests. Know that this thing will not work if you are infected!

Take a glass jar covered with masking tape (masking tape) and place it in the most frequented places by insects. Silverfish will climb naturally on the pot and go refuge. Since they can not climb on smooth surfaces, they can not crawls out of the pot. Therefore, you can put in the pot some soapy water to kill them. Here you go!


How can I get rid of silverfish and firebrats?

Cleaning

Cleaning is the most important part of controlling silverfish and firebrats, as it is for all crawling insects.

  • Vacuum often to help remove food particles and insect egg masses.
  • Regularly clean around and behind appliances and machinery, inside cupboards, drawers, and pantries.
  • Keep countertops clean.
  • Also clean beneath sinks and other dark or humid locations.
  • Wrap or insulate pipes that have too much moisture. Repair leaky faucets and pipes. Ventilate bathrooms and dehumidify areas of excess moisture.

Traps

Silverfish and firebrats can be easily trapped in small glass containers (like baby food jars). Wrap the outside of the glass with tape and set the container upright in areas where you have seen silverfish or firebrats. The insects will climb up the taped surface, but they will be trapped in the glass container, because they cannot climb smooth surfaces.

Laying Vinyl Flooring

Things to look out for onsite when installing vinyl flooring

We have compiled a few useful tips to ensure the result ticks all the right boxes, with no costly comebacks from your client:

Daily demands and deadlines often result in it being difficult to visit sites as often as intended.  Regular site visits are imperative for the success and smooth running of your project.

Have you notified your building and flooring contractor of your visit? Have you considered their schedule and obligations?  Empathy and consideration will go a long way in achieving a mutually beneficial outcome.

Is the site ready for the vinyl installation? Is it free from other trades?  Don’t improvise! Too often flooring contractors are instructed to install the vinyl flooring when the site is far from ready, with disastrous effects.

Are the site conditions favourable for the flooring contractors? Is the lighting acceptable?  Are the timelines achievable?  Projects too often run over with the flooring contractors having to work under tough conditions and having to meet unrealistic deadlines.  This ultimately affects the quality of the installation and very often results in a costly re-do.

Identify any structural expansion joints. Structural movement will affect a vinyl installation and it is important to ensure the correct expansion joint covers are used over all the expansion joints to avoid any after-the fact comebacks.

Have saw cut joints been made? How deep are they?  When laying the screed topping, saw cut joints may have been specified to prevent cracking whilst the screed is drying.  Best practice is that saw cut joints are approx. 40mm deep and that they were done with the floor plan and design considered.

Is the screed level, smooth and contaminant, dirt and dust free? Vinyl will show imperfections in the screed and this step in the process is critical in producing a quality finish.

What thickness self-leveller was applied? Is it per your specification?  As the screed levelness is so vitally important and given the fact that realistically, there are very few contractors in the country today that can deliver a Class 1 screed, be sure to specify a self-leveller.  Specify at least a 5mm thickness even though we recommend assessing the substrate to determine what thickness of self-leveller is required to attain an average of at least 5mm.

Is the screed soft or powdered and are there any visible cracks? The screed must comply with at least 25MPa strength.  Ensure there are no hollow patches and check for any cracks which could result in delamination of the screed

What is the moisture content of the screed at 40% depth? Vinyl and a wet substrate are archenemies.  We recommend using a reputable moisture reading instrument such as a Protimeter or a Wagner meter which enables you to be able to read at depths of 40% and ensure you have no moisture issues. It is important to determine the moisture reading at this level as generally, the surface moisture evaporates fairly quickly but the moisture deeper within the screed may take longer to evaporate.  It is guaranteed that moisture will rise to the surface once you install vinyl because of the moisture pressure equalising within the screed.

Check surrounding areas for indication of excessive ground moisture ie. vlei, slopes, clay etc. Ground conditions in the area can affect the moisture seeping into the structure.

Be mindful of the temperature at the time of installation. The ambient temperature affects the adhesive curing period in the winter months.  It is common to have installation issues at 12ºC and below and it is advisable to consult your adhesive and screed manufacturer to advise on best practice for their product.

What was the ventilation like over the drying period? Poor ventilation causes adhesives to take longer to flash off, self-leveller longer to dry and causes a screed to powder.  Excess ventilation is also not ideal as it could cause the screed to dry unevenly and settle differently, causing cracks and unevenness.

Is the correct material and adhesive on site? Check colour, batch and roll numbers.  It is common to experience some colour variation in different batch numbers.  Ensure you have received stock from the same batch number and insist on sequential roll numbers. It is also very important to note the manufacturer’s recommendation on the correct adhesive to use per product, as an adhesive failure could result in the flooring manufacturer voiding their product warranty.

How were these rolls stored? Has the material been rolled out and left to relax and acclimatise?  Make sure to check the manufacturer’s recommendation as to product storage.  Sheeting requires rolls to be stored upright whereas rubber stores flat. LVTs should not be stored in boxes of more than 5 boxes high.
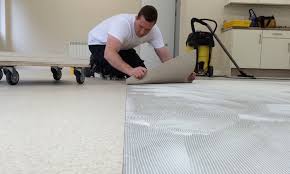
 

INSTALLING VINYL FLOORS – A DO IT YOURSELF GUIDE

It’s week 5 of the One Room Challenge! Yikes, did these last few weeks fly by! This week was all about installing vinyl floors. I have been wanting to replace the old carpeting in our home for a very long time, so when the day finally came to rip those out and get these beauties installed, I was beyond thrilled!

PLANNING:

Most importantly, you will want to do your research and pick the right floors. A blogger friend recommended Lifeproof Luxury Plank Flooring  (previously referred to as Allure ISOCORE, they are currently undergoing a name change) to me. The first thing I asked about was installing the underlayment. I was shocked when she told me that these floors had the underlayment built right in, completely eliminating that whole step! Honestly, I thought it was too good to be true and I questioned the company on it, and they assured me that it is indeed true. That alone makes these floors stand out, saving you time, money and labor.

PREPARING SUB FLOOR

By subfloor, I mean whatever was under your existing floors before. When we pulled up the carpets we found staples attached to the wood boards underneath. All of these must be removed prior to installing. It has to be a clean, smooth surface. This was the worst part of installing the new floors,  you can read about how to remove carpeting here

FIX SQUEAKY FLOORS

This is the time to fix those annoying squeaky floorboards. When you find a squeaky spot, simply drill a drywall screw in the subfloor next to the nail in that area. It’s easy and it works!

INSTALLING VINYL FLOORS:

My husband really liked the finish on the Lifeproof Multi-Width Walton Oak Luxury Vinyl Plank Flooring so that is what we chose. (You can also check out my friend Tara’s choice of Lifeproof floors in the Seasoned Wood finish). I liked the varied wood tones of the wood and the different sized planks. When installing there are several patterns you can make with the multiplanks, so you will need to plan ahead before you begin so that you have an idea of your layout. None of the patterns are complicated to do.


What is Luxury Vinyl Plank Flooring?

Pros and Cons of Luxury Vinyl Flooring (LVP and LVT).  And, what is Luxury Vinyl Plank Flooring?  What about Engineered Vinyl Plank?

As you’ll see, vinyl has come a long way since its original introduction in the 1930’s.  There are now options that look and feel so real, many mistakenly think they are hardwood

What does LVP stand for?  What does LVT stand for?

First, LVP stands for Luxury Vinyl Plank and LVT stands for Luxury Vinyl Tile.  As the name implies, Luxury Vinyl Planks look like planks of hardwood floors; and Luxury Vinyl Tile looks like Tile (or natural stone).  They are individual pieces of vinyl (not sheet vinyl), so they look very similar to the real thing.  Most luxury vinyls are waterproof (or highly water resistant).

Now, there are multiple types/forms of Luxury Vinyl and different grades, as I’ll discuss below.  (The cheaper ones are often water resistant rather than waterproof.)  And, you are more likely to find cheaper ones and knock-offs in the big box stores, so don’t be fooled.

What is the definition of EVP?

EVP stands for Engineered Vinyl Plank.  It’s a segment of Luxury Vinyl Flooring.  Engineered Vinyl Plank (EVP) has an incredibly realistic hardwood look (and feel) and is exceptionally durable.  It’s waterproof and has a strong high density fiberboard core.

Engineered vinyl plank is much thicker than the typical glue down vinyl.  It’s usually 8 mm thick, so it’s similar to an engineered hardwood (or laminate flooring).  Like engineered flooring, it’s constructed in layers.  The top layer is vinyl, the middle is a high density core board and usually there is an attached back underlayment (e.g. cork) for more cushioning.  Like laminate, these floors are clickable so they are easy to install.

 

SELF-ADHESIVE VINYL TILES – HOW TO GUIDE

You’re already convinced of the first-class look that a tiled floor has to offer, but at the same time shy away from the disadvantages of the heavy and cold stone tiles? If you are also looking for a very simple installation option, then self-adhesive vinyl tiles are just right for you! Vinyl flooring is not only available in a slim plank format, vinyl now also passes as a handy tile. The surface of authentic tiles is reproduced completely and in detail, so that there is no difference in appearance.

In addition to the aesthetic appearance, laying is one of the key benefits of the self-adhesive vinyl tiles. These can be easily and quickly laid to the ground and do not require the help of a professional. Now, if you’re wondering how to lay this versatile vinyl floor, pay attention! We will explain how to proceed in order to achieve an optimal and appealing result. In a few steps you will finally obtain your new dream floor!

LAYING VINYL FLOOR TILES – WHAT DO YOU HAVE TO PAY ATTENTION TO?

Everyone already knows how to lay laminate tiles. The laying of tiles is difficult, but no longer a mystery. When it comes to self-adhesive vinyl tiles, things will look different! It is a practical alternative to the simple click mechanism, which definitely deserves more attention.

Vinyl tiles are not only a wonderful alternative to boring stone tiles, but you also get the self-adhesive installation method saves you a lot of time and nerves. Thanks to the practical adhesive backing, the vinyl tiles can be attached to the surface in an unusually simple way. The best part is that you do not need a professional! However, some things have to be considered in advance, so that no problems arise later. In order to guarantee that your new floor is absolutely even and beautiful

PROPER PREPARATION – THE NUTS AND BOLTS OF INSTALLATION

Before laying of self-adhesive vinyl tiles can start, some preparations must be made. First, make sure that you have all the tools you need for the installation. Since you have opted for self-adhesive vinyl tiles, you need very little here. A carpet knife, a metal ruler or similar and a measuring tape will suffice in order to lay the vinyl tiles safely.
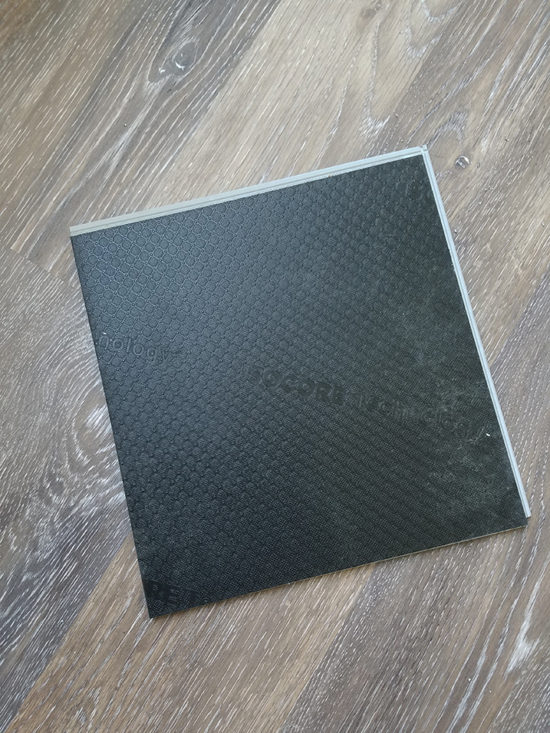
 

RIGID FLOORING VERSUS VINYL FLOORS

All waterproof vinyl floors fall under one category called resilient flooring. Each type of resilient floor has its own unique construction, but the one thing they all have in common is P.V.C, (polyvinyl chloride). Each of these floors will have a percentage of PVC in them of vary amounts. PVC is why some refer to resilient floors as waterproof.

PVC is also known as plastic or vinyl, and it has been around for decades, but the new category of flooring, called M.L.F. (multi-layer floors) has changed the resilient flooring category forever. These floors are not like anything your mother or grandmothers had in their kitchen or home. Technological advances have made it possible to create a very durable, waterproof, and fashionable resilient floor that looks like real wood, linen, or stone

For this article, we will focus on the difference between rigid flooring (MLF) and vinyl floors (PVC) floors, because this is an area in which there has been some confusion and misinterpretations of the products. When considering any kind of PVC floor, there are six points you need to consider. 1. Health 2. Dent Resistance. 3. Dimensional Stability. 4. Installation. 5. Telegraphing and subfloor. 6. Fashion. Why is fashion last? Fashion or style is subjective, and it is the one thing both products can deliver, regardless of the construction of the resilient floors.

Construction: Vinyl floors are made up of PVC, additives for flexibility, and aggregate for density and durability. However, the PVC that is used to make the vinyl floor is essential. 100% virgin vinyl is the best choice for your health, and for the floor’s durability and stability. It means there is no recycle vinyl content in the construction of the floor, and it is Ortho Phyllite free, and free of heavy metal contaminants. This is very important to look for when buying vinyl floors. Ortho Phyllites are considered to be harmful to people and pets. This is why 100% virgin vinyl is the only kind of PVC vinyl floor you should have in your home. Better safe than sorry as the saying goes.

Dimensional Stability: Expansion and contraction is a factor in all flooring, including vinyl floors. Vinyl floors will contract and expand and must be acclimated to the environment for at least two days before installation. This may be challenging for meeting tight construction deadlines.

Reliable Provider of Moving Services

Moving has never been an easy task to many people. It’s one of those few tasks that can bring you a lot of headache. But when it’s your time to move, selecting the right company to help you move will help relieve the stress that’s associated with moves hence making it a bit easy for you. Moving companies offer you the chance not only to move in a very simple way but also offers you the chance to move without worry. Even if you are making a complex or a simple move, this company is perfect for you!

Moving companies cover a very wide are a hence you can rely on it. Regardless of where you would like to move to, be it within or outside the state, you will appreciate getting efficient services that can make your move smooth. You will get the peace of mind that you will need. You will not get worried at all about your valuables while on transit since the comprehensive insurance cover that is available will cater for any eventualities that may occur on the way. The task will be carried out by highly qualified staffs who understand the shortest ways to execute the task.

When everything is properly packed and put on the van, space will be maximized. That reduces the amount of trips required. Where you would efficiently pack a van, 2 trips could be reduced down to one. That would lower the cost of a relocation significantly.

Moving companies will help provide you with accurate solutions to your moving problems. Its a fact that every simple mistake done can be costly hence this company will ensure that you are offered the right kind of a solution that can help you effect your move from one place to another. The company can offer you the necessary help that can help you make your move easier and more convenient. You will be told of the space that your goods will occupy the right packaging material that’s necessary to ensure that your goods are well put and carried.

What occurs if items are lost or damaged? Such problems could be unavoidable in spite of how alert the moving companies would be. What would transpire when the moving van is hit by a reckless driver? Sure, there might be unexpected problems that could take place causing severe damage. Which would be the reason a number of moving services provide insurance plans. If you get extra coverage, the capability to get back any monetary losses would be possible. While that might not always restore your personal items, that could safeguard you from serious economic losses.

Now that you know the three most important decisions that need to be made before you get a moving price estimate, you just need to take time to decide on the answers. Once you do that, using estimates to help you decide what company to hire will be simple and you will be confident that you are making the right choice.

Tips To Avoid Home Renovation Mistakes

Cheap Remodeling Ideas

Renovating or remodeling your home does not have to be expensive. Whether you are trying to update and remodel a house to get it ready to sell or to make it a more comfortable place for you to live, there are plenty of ways you can fix up your house without spending a lot of money. These changes will:

  • make your house a more comfortable place to live,
  • help increase the market value,
  • make it look better for your guests who visit,
  • and let you enjoy your house to its fullest extent.

Here are some tips on how to save money as you remodel, renovate, and beautify your home.

Remodeling and Renovating on a Budget

Remodeling and renovating a home does not have to be expensive. Here are a few ways to remodel your home without breaking the bank.

  • Make changes that have a big impact.
  • Considering small things that make a big difference.
  • Do it yourself.
  • Trade and barter for labor.
  • Borrow or rent tools.
  • Shop around for the best price.
  • Consider your needs when you buy.
  • Buy second-hand goods.
  • Think creatively.

By using the tips provided, you can save a great deal of money while increasing the functionality and beauty of your home. 

Make Big-Impact Changes First

To save money, you want to consider making the changes that have the greatest impact first—the things that will get the most bang for your buck. Things like paint, flooring, lighting, and arrangement and existence of appliances and furniture. A fresh coat of paint can quickly and economically update, brighten and enhance a home.

Then, if you still have money in the budget, you can make the changes that will enhance the home in more subtle ways.

Smaller Changes That Can Have a Big Impact

In addition to thinking big, you should also think small. There are small changes you can make that make a big impact as well.

  • Changing the hardware of cabinets, for example, can change the look of the kitchen without having to replace the cabinets.
  • Painting the trim instead painting the whole house might be sufficient depending on your situation.
  • Adding a drawer organizer might keep you from needing another drawer.
  • Repairing instead of replacing some things could avoid headaches and cost less, depending on the amount of time and material it would take to repair them.
  • Changing the rug or towels in the bathroom, or a new bedspread or curtains in the bedroom can change of the look of the room without any remodeling whatsoever.

Understanding when is a home equity loan a good idea

A home equity loan is a secured loan. You offer your home up as collateral, and in exchange the bank extends you money that has to be paid back over a specific period. Since your home acts as collateral, you can usually get better terms on the loan than you would without collateral being offered. And you may save money on taxes based on your individual situation.

This means that you can get a lower interest rate on the loan than what you’d qualify to receive on a loan without collateral. Low interest means you’ll end up paying less money over the life of the loan.

For example, the total interest paid on a 3-year loan for $10,000 at 5 percent APR is $789.52, while at 6 percent APR the same loan would cost $951.90 with added interest. The monthly payments are also slightly higher at six percent versus five, because you have to pay more within three years to pay it off with interest added – the difference is about $5 on this example.

So on one hand there can be good reasons to use a home equity loan.

Increasing my mortgage – what is a further advance?

A further advance is taking on more borrowing from your current mortgage lender.

This is typically at a different rate to your main mortgage.

This route can make sense if:

  • Your lender’s further advance is competitive
  • You don’t want to remortgage or switch lenders.

You can spread your payment over a long term and your interest rate should be lower than a personal loan.

But always check the market to see if you can get a better deal before committing.

When a further advance might make sense

There are two situations when a further advance might be suitable:

  • To fund home improvements
  • To raise a deposit for a second property, perhaps as a buy-to-let investment

Can I Get A Mortgage For More Than The Value Of The Property?

The family member has had the house valued at $120,000 but has offered it to us for $70,000 to help us on to the property ladder.

The house is in need of a rewire, central heating and new windows, bathroom and kitchen.

As the house is valued at $120,000, would it be possible to take out a mortgage of $100,000 even though we are buying the house at $70,000? 

No lender will give you a $100,000 mortgage to buy a property costing $70,000. Any mortgage offer will be based on the purchase price of the property – even if this is lower than the actual value. And the most you’ll be able to borrow with a conventional mortgage would be 90% of the price which, in your case, would be $63,000. To be able to get a mortgage of $100,000 you would need the purchase price to be just over $111,111 and to be able to put down a cash deposit of $11,111.

That’s not to say you won’t be able to borrow to pay for renovation costs as most mainstream lenders are prepared to lend money for building costs but they don’t pay the money up front which wouldn’t suit you. Instead any money lent is paid after the building work is complete and the property has been revalued.

To be able to pay for building works before they are finished, you’ll need a specialist renovation mortgage such as those available through Buildstore Mortgage Services. Its Ideal Home Improvement mortgage allows you to borrow up to 95% of the cost of the property as well as up to 95% of the improvement costs. So you might be able to borrow $66,500 to buy the house and $28,500 to put towards the cost of renovating. You’ll still need to find cash for the deposit on the property and the first 5% of renovation costs.

Electrical Switches Installation And Sockets

One-Way Lighting Circuit Modified for Two-Way Switching

Here are some helpful diagrams that show how lighting operating on a one-way switch can be changed relatively easily for two-way switch operation.

Turn off the consumer unit and remove the appropriate circuit fuse / miniature circuit breaker first before working on any electrical circuit, once the cable is installed make the connections to the two-way switches as shown.

show the original switch connected with original (old colours, twin Red and earth) switch-wires and the additional two-way switch linked with cable in the new colours, which in the case of three core and earth are Brown, Black, Grey and an earth-wire which should be covered with Green and Yellow sleeving. This is because electrical cable is only available to buy in the new colours.

Whenever an electrical installation uses both colours of cable, a self-adhesive warning label should be stuck to the front of the consumer unit.

The label normally reads:  CAUTION  –  This installation has wiring colours to two versions of BS7671. Great care should be taken before undertaking extension, alteration or repair that all conductors are correctly identified. These labels can be obtained from most electrical wholesalers for a few pounds as a cash sale.

Outdoor installation hints and tips

We want you to get the most from your Hive View Outdoor. Here are some tips to help you find the perfect spot to position and install it.

Hive View Outdoor automatically starts recording if it detects motion or sound. But switch on people detection and it will only record if it picks up a person.

Here’s how to get person detection working for you:

Height: Make sure your camera is just above head height, between 2-2.7m (or 7-9 feet) from the ground.

Angle: Your camera needs to be slightly tilted down – around 30° (see image 1 below). Any more than 40° and your camera might not be able to see a person’s face, especially if they’re wearing a hat or hoodie.

Range: For person detection, the range of the camera is 12m/40 feet during the day and 4.5m/15 feet at night. If you want to monitor an area further away than 12 metres, the best thing to do is set your camera to motion detection rather than person detection.

Testing: When your camera is set up, walk past at the maximum range you need. If it doesn’t detect you, try switching motion detection on the settings screen in the app.

For porches and entrances use full motion detection.

Person detection is ideal if you want to detect people from other movements. But if your camera is tilted down and monitoring a small area like your entrance or porch, you might not need it. Instead, set your camera to motion detection to make sure it captures everything.

Keep your camera in the shade.

Hive View Outdoor is weatherproof and designed to work between -20 to 45C (-4 to 113 F). Just make sure it’s well ventilated and not positioned in direct sunlight. This avoids overheating, and your camera being triggered by a sudden change in brightness like the sun going behind a cloud.

How Much Does It Cost to Replace a Light Switch?

The cost to replace a light switch is $50 to $200. The difference depends mostly on the type – standard, double, dimmer or timer switch.

If you have a light switch that no longer works, it needs to be replaced. Unless you are unfamiliar with electrical work, it’s wise to bring in a professional. An electrician can help make wiring a light switch hassle-free. He’ll also be able to install an upgraded light switch that can make your life a little easier.

Switches with extra features like dimmers or timers can really amp up the functionality of a simple switch. While these may cost a little more than your standard light switch, they offer a few benefits that may be worth the extra price tag.

Home Electrical Upgrades and Costs

When you call an electrician into your house, you’re trusting them to know what they’re doing. Check out our tips on avoiding expensive upgrades you don’t need.

Standard Light Switch Replacement

A single light switch is the most standard “on and off” switch you have in your home. It turns on and off one item, such as a light or a fan. Over time, the crisp up-and-down click of the switch begins to wear out. When you feel this happen, it’s best to replace the switch before it completely fails to operate.

Tips For Professional Wireless Access Point Installation

Congratulations! If you’re reading this, you probably purchased a new wireless system or are thinking about it and are looking-up some of the best practices for performing your wireless access point installation. Before you begin, it’s important to know that there is more to WiFi than meets the eye, and things you may not consider, like where and how you mount the access point, matter a lot more than you think.

Wireless access point installation isn’t difficult but if you get it wrong, you will feel the pain. We’ve seen some really funky installations and have heard horror stories from clients about so called “tips” that they received from self-proclaimed wireless service experts. Our clients have told us that other providers recommended mounting access points at 45 degree angles or waiting up to 7 days for wireless signals to propagate within their office. Knowing that people have paid other service providers for such terrible advice is simply horrifying and we’re here to tell you the truth. Part 1 of our tips for installing wireless access points will focus on your network requirements, your existing network environment, as well as, the physical installation. Part 2 will focus on advanced network configuration and how to prime your wireless access points for peak performance.

Whether you’re installing access points at a large office, home, warehouse or open area like a park or boardwalk, taking the following steps will typically leave you with a usable WiFi network that will stay connected and provide that bandwidth throughput that you expect

Understand all of your network requirements

Knowing your network requirements is perhaps the most essential stage of any WiFi installation. Think about how many people, or more specifically, how many devices, will be connecting to the network and what types of activities they will be doing online. Jot your notes down or even create a spreadsheet to capture your thoughts in an organized fashion and make the rest of these steps a whole lot easier.

Choose the right equipment for your wireless network

Once you determine your requirements, it’s a lot easier to find the right access point, but the large selection can still present a challenge. There are so many options on the market that even wireless professionals find themselves overwhelmed trying to pick the best access point for their customers’ budget and requirements.

Setting up the Wemo Smart Light Switch

Installation of the Wemo Light Switch to the electrical line

It only takes a few minutes to set up your Wemo Light Switch.  If you are unable to identify which is a load wire and a line wire, or is unfamiliar or uncomfortable with electrical work, please call a professional electrician.

Electrical Installation Requirements

A Neutral wire (requires all three AC electrical connections at the wall switch)

A single pole light switch (not compatible with lights controlled by more than one switch)

IMPORTANT:  The Wemo Light Switch is not designed to work with metal faceplates because they interfere with the Wi-Fi signal.  It is recommended to use the light switch for residential and dry indoor locations only.

Shut OFF the power at the circuit breaker for the switch you are replacing.  You may need to shut OFF more than one circuit breaker/switch to make sure the switch you’re working on is powered OFF.